It’s no surprise that I love the Nord color scheme. Although I had known about it for years, my appreciation for it has only grown exponentially. I guess you could say I’m a Nord-aholic. When I think I might want to go back to Dracula or Gruvbox, Nord finds a way to keep me content and I just stay with it even longer.
In the past few days, I’ve discovered a couple of other ways to enjoy or compliment the Nord experience that I had previously been unaware of. Chances are you may know some ways to use it here and there, but some of these methods may surprise you.
Anything I Previously Covered
I previously covered using the Nord GTK theme on a Linux system in my top color schemes post. People on Windows, however, do have some options compared to Linux users. The key word is some, as your safest options would involve changing wallpaper to Nord wallpaper like in this cache of Nord wallpapers and then changing your Windows accent color in the settings.
You could potentially do more like use this Nord for Windows 11 theme from niivu, a very talented user on DeviantArt, but if my experience on Windows 10 is any indicator, a future update would erase it at best and break the system at worst. You could try it if your Windows 11 version matches what’s there, but YMMV.
Mac users have just about the same options as Windows users in this case. Setting a wallpaper and selecting an accent color seem to be the extent of it unless you’re really going all-out and using tools such as yabai, skhd, and perhaps sketchybar (probably the best option for tiling WM users running M1 Macs right now). In which case, you can search for the right sketchybar configuration to suit your needs and set the colors to go with Nord.
I’ve discussed setting one’s terminal emulator to use the Nord theme (I previously suggested using the Nord Theme for Alacritty, although I’ve been using Kitty more often as of late and have set the theme there).
For those using Spotify-TUI, I even went so far as to make my own Nord theme for the app myself. I specifically designed it so that the time remaining in a track would still remain visible when the bar overlapped in the progress bar.
Additionally, I’ve even discussed a few other options like setting themes within a few applications such as Obsidian, although I’ve discussed that and much more in my Obsidian power user setup guide. I’ve also gone in-depth with other options like using a heavily-customized Rofi theme setup and setting it to Nord, setting SpaceVim’s colorscheme parameter to nord, and even setting up the Nordzy cursor theme to go with everything. (Some of you may have noticed I didn’t bring up icon packs; I will discuss that later on.)
Deck Out your Chrome/Edge Browser with Nord Aurora Colors
DeviantArt user sublime9-design created a Nord Aurora Theme for Google Chrome and Microsoft Edge. As I do use the latter for work-related tasks to this day (I like to compartmentalize my personal links from my work links), I gave this theme a spin on the latest Microsoft Edge for Linux and love how it looks.
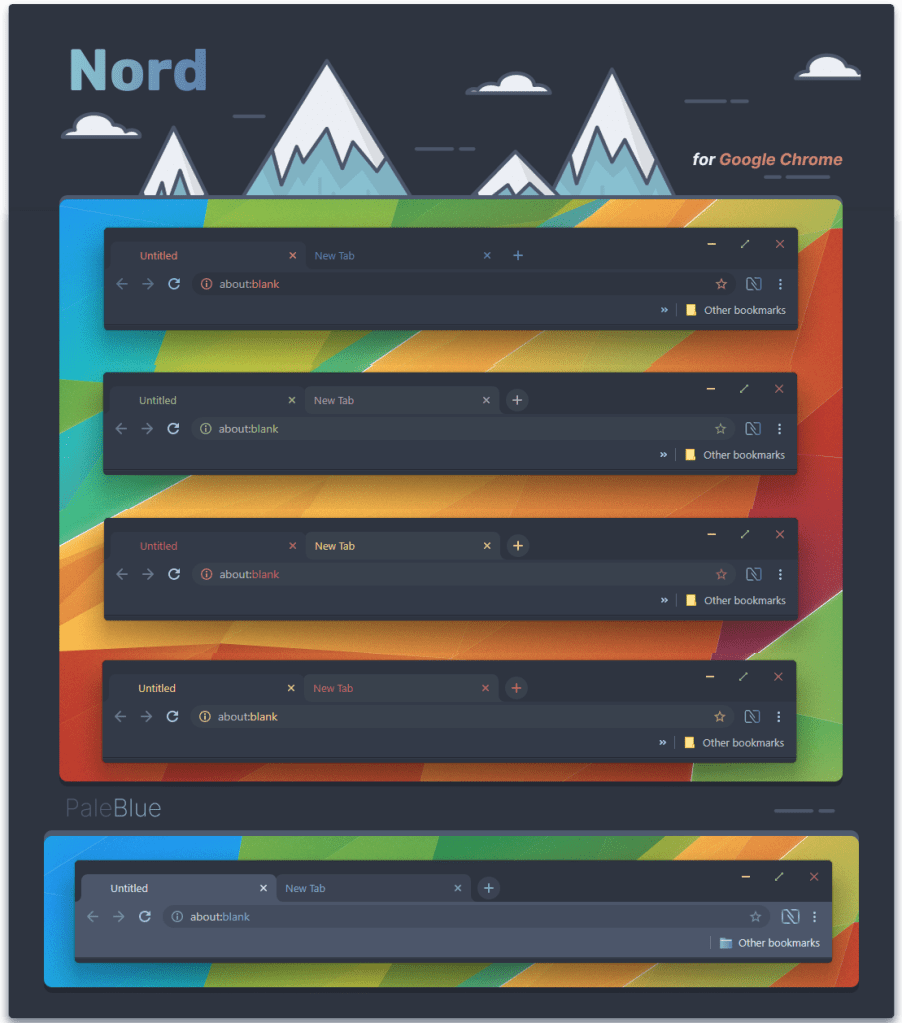
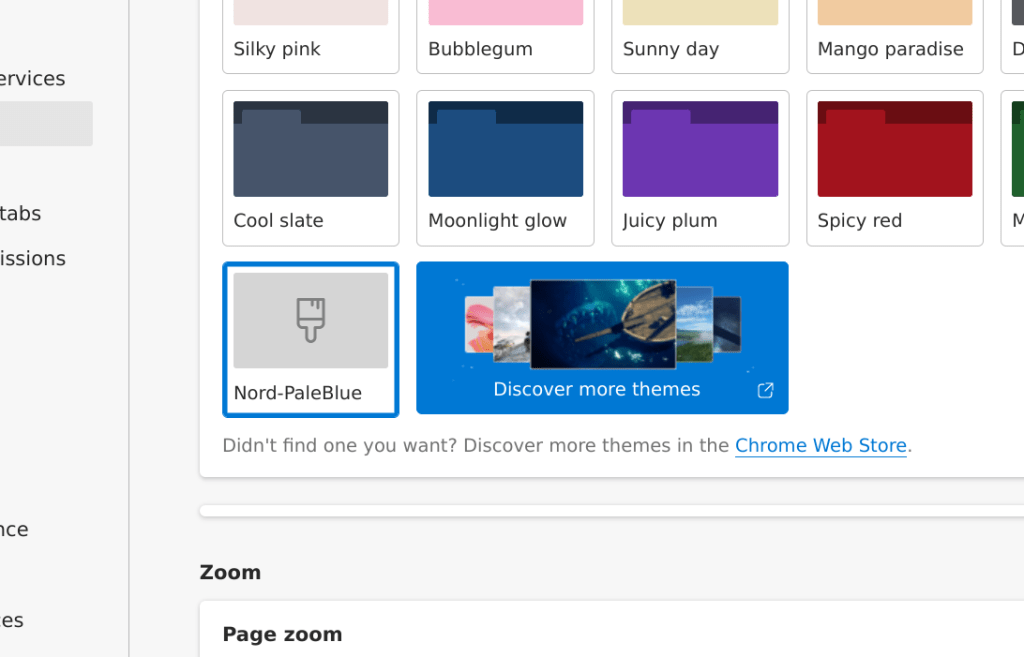
I know I could easily use the other ones, but I gravitated straight to PaleBlue. It looks so good.
To install on Microsoft Edge, you’ll need to download the file from the DeviantArt page and uncompress it. Afterwards, within your Edge browser, head to edge://extensions and find the toggle on the sidebar to enable developer mode. Once you do, you’ll see the option to “Load unpacked” pop up.
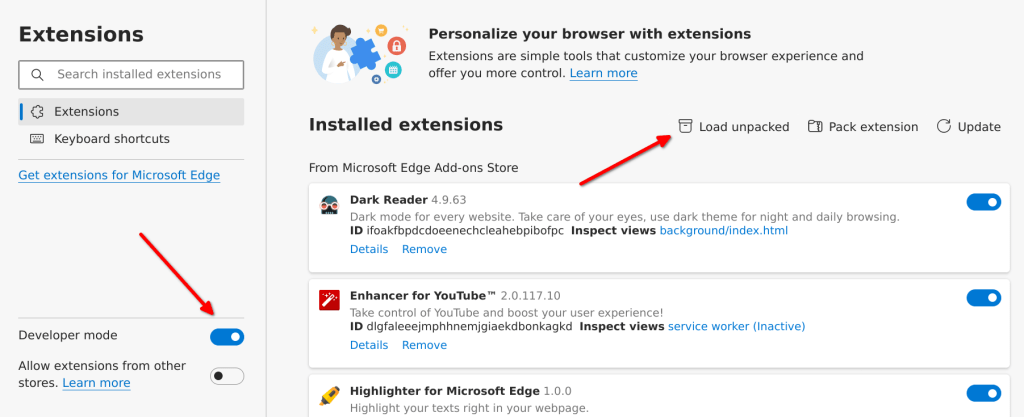
Despite the fact that this is a theme and not an extension, you still need to use the “Load unpacked” button in the Extensions menu to install it. Click the button to open up a dialog menu where you can navigate to your uncompressed file.
Keep in mind that uncompressing the folder means you’re going to find four folders inside. Within each folder will be another folder with the same name as the theme alongside a .crx and .pem file. Within this folder, highlight the folder without going inside of it, and then click “Select” or “OK” to choose it for the menu.
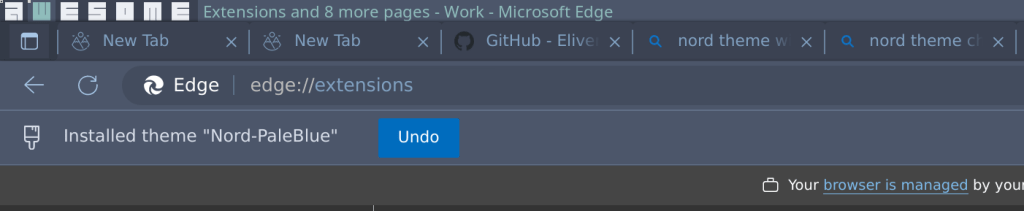
If successful, a little bar will pop beneath your bookmarks telling you that you successfully installed the theme.
Every Website: Now with a Nord Theme!
Wait, really? The Nord color scheme on EVERY website? For real? Sound too good to be true?
Rest assured, it’s not. 😉
I could have easily linked to a custom CSS sheet or Stylish script here and there to theme certain websites only, but that wouldn’t even begin to encompass the scope of the web’s offerings.
But now it’s extremely easy to get sites to follow the Nord Theme using everyone’s favorite dark mode extension: Dark Reader. Don’t let the plain, default-looking “Dark Mode” theme fool you. You can easily set this up to theme sites out in Nord, and much more easily than you would expect.
To see for yourself, install the Dark Reader extension first. Their homepage should be more than enough to help you get started with that.
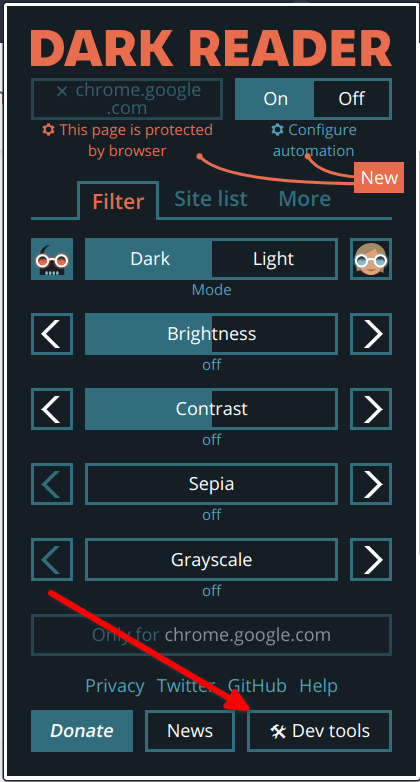
Installed it? Good, now, open up the menu for the extension from your toolbar. Look at the bottom for the “Dev tools” button.
Once you click on Dev tools, a new window may pop up. Find the button that says “Preview new design” on the bottom right of the window.

Click it and then close the window. Back in your main browser, open up the Dark Reader menu again. It’s going to look different from the first screenshot now, as you’re going to be in the new design mode.
In this new menu, go down where it says “Theme for all websites” and click the button to “See all options.”
In the box that pops up from there, find the button that says “Colors.”
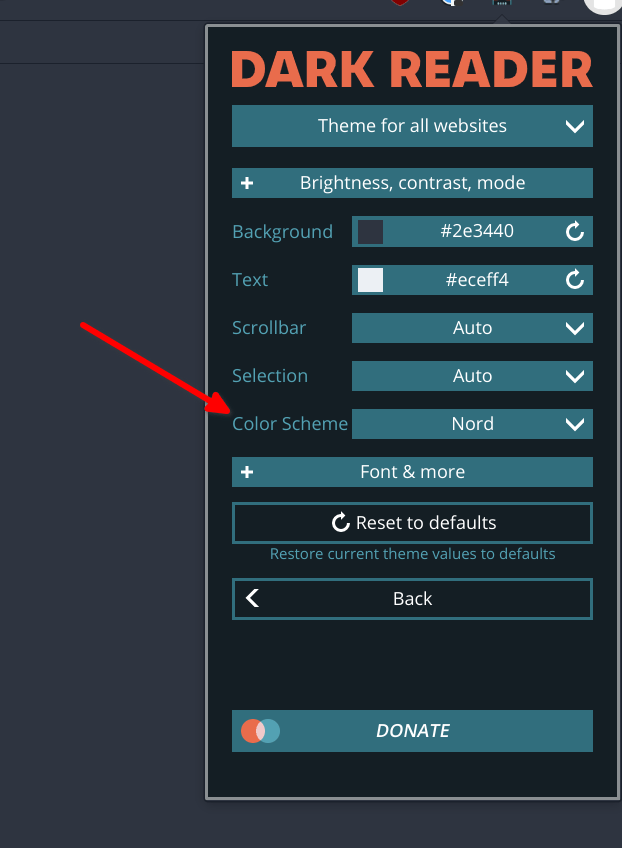
Where it reads “Color Scheme,” select Nord.
That’s it! Enjoy looking at your favorite websites in the Nord color scheme! Most sites I look at tend to look excellent; it’s only the occasional page that won’t look quite right, but it’s very good at theming sites overall. (For anyone curious, other popular color schemes are also available in this option.)
ImageGoNord: Make More Nord Wallpapers
If you love decking out your UI to match Nord, but wish you had more appropriate wallpapers to pick from, you could always try converting an existing wallpaper using ImageGoNord, a tool from Shrodinger’s Hat that filters and converts images to have the Nord color scheme.
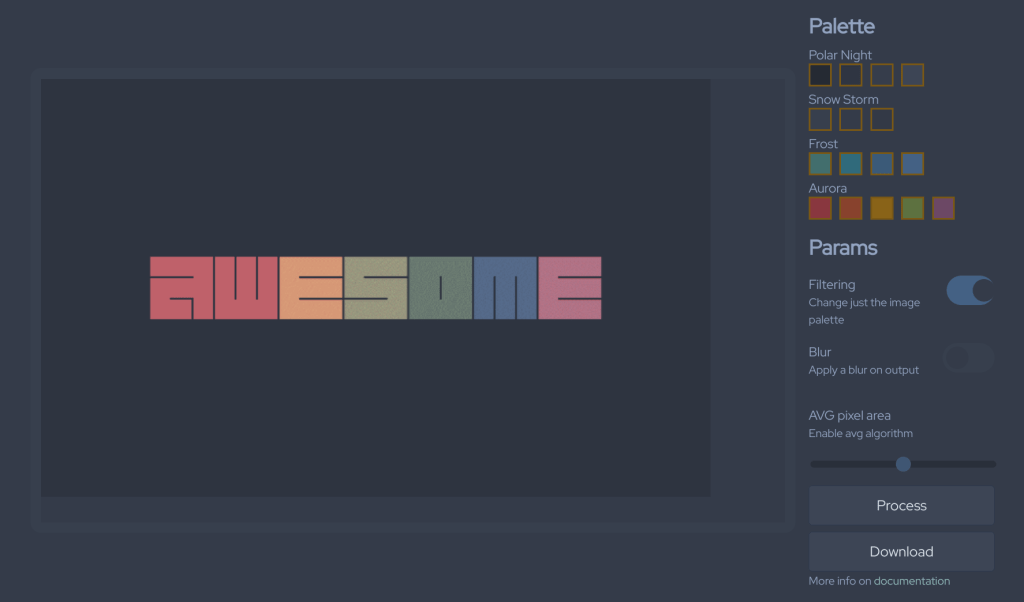
You may get some artifacting here and there, and some wallpapers may lead to occasional duds (avoid wallpapers with a lot of flare effects and gradients for best results), but the tool is still impressive for what it does. Try uploading some wallpapers and test them out on different settings. You may eventually be quite pleased with something you get.
Papirus-Nord Icon Theme
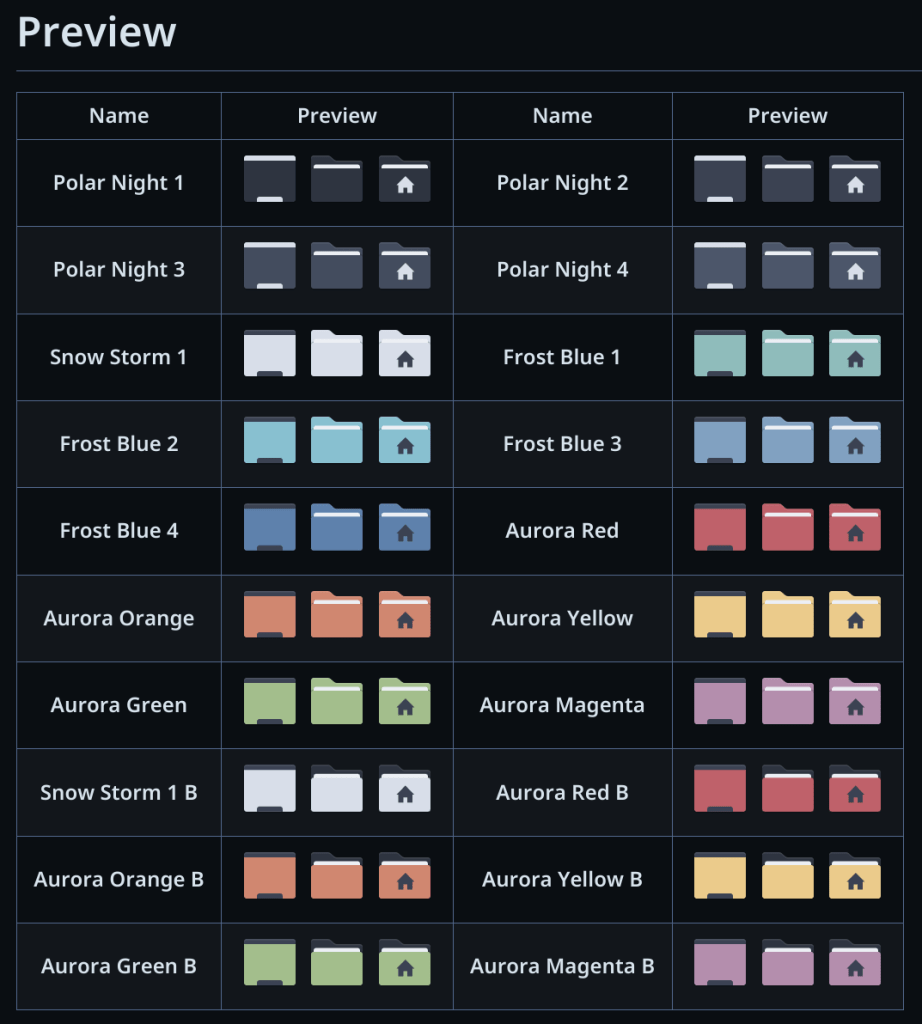
I saved my favorite discovery for last: Introducing the Papirus-Nord Icon Theme! The Papirus Icon Theme was already good enough, but this takes it to a whole new level by giving you access to folder colors in every possible Nord shade according to the color swatches.
To install this, you need to first have the Papirus Icon Theme installed beforehand. Although you could install it through a package manager, I would recommend using the script on the Github page:
wget -qO- https://git.io/papirus-icon-theme-install | shOnce you install that, you’ll want to run the Papirus-Nord script to get the Nord colors installed. Here are all the commands you’ll essentially need to put in in the correct order:
git clone https://github.com/Adapta-Projects/Papirus-Nord.git

cd Papirus-Nord

sudo ./install
Once you run the three commands above, you should have the Papirus-Nord folder colors installed. To double check, run papirus-folders -l in your terminal. You should see the options for the folder colors in the above preview picture appear:
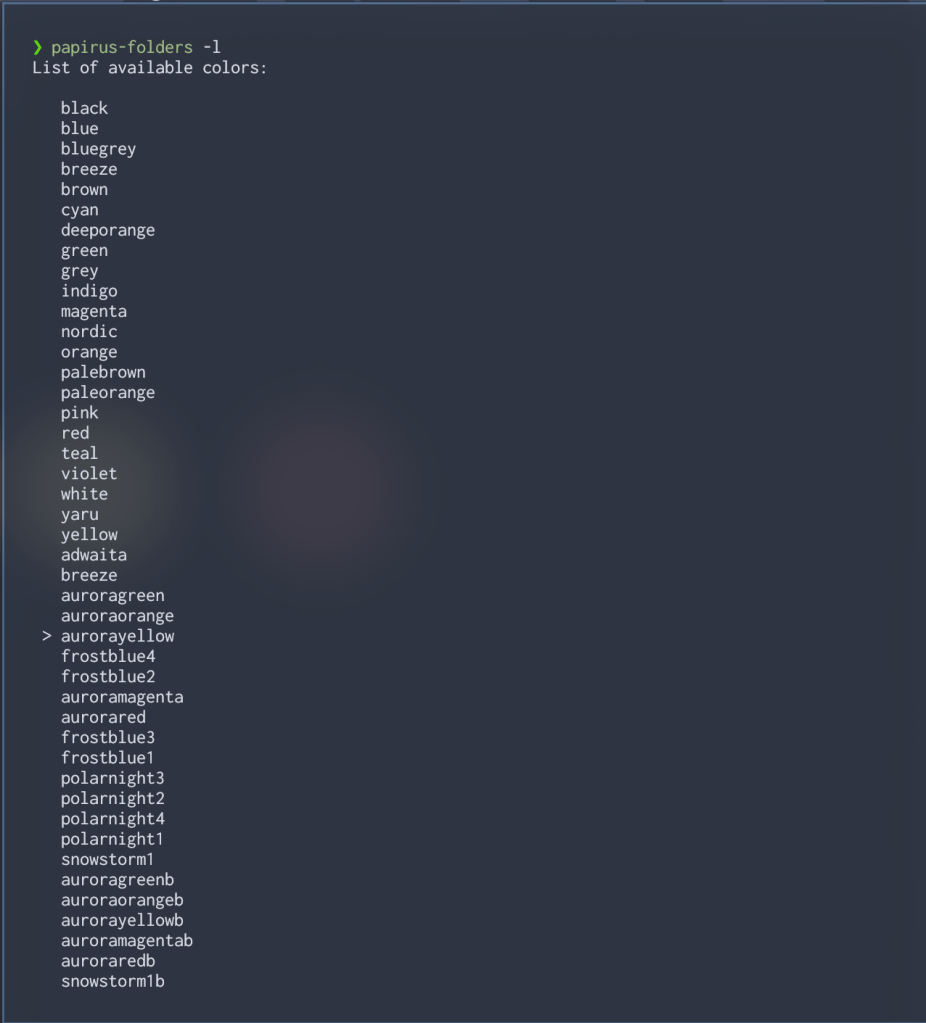
If you don’t see the Nord-related color schemes appear, something went wrong and you’ll have to do some troubleshooting if you want to get them working. See my “QUICK NOTE” further down for information on that. (You could proceed without fixing anything, but the following commands will only result in errors and nothing will change.)
To change your folder icons, you’ll want to enter a command like so:
papirus-folders -C frostblue4 --theme Papirus-Dark Keep in mind that this command will change all of your Papirus icon colors to the Frost Blue 4 ones in the preview picture under Papirus-Dark only. If you want to specify Papirus-Light, change the end to say “Papirus-Light” instead.
Alternatively, if you don’t care about changing the color for dark or light, you can do it with every Papirus icon set installed by skipping the --theme operator altogether. For instance, this command should still work just fine.
papirus-folders -C aurorayellow QUICK NOTE: While I got everything to work perfectly and easily on my first try with my Arch Linux system, I had some problems with Fedora 38. To successfully troubleshoot, I had to enable a different icon theme, manually uninstall the main Papirus Icon Theme (see the Github page for the command on how to do that properly), reboot my system, reinstall the Papirus Icon Theme from the Github page again, and THEN run the Papirus-Nord instructions one more time. After that, everything worked perfectly and I was able to select the icon colors I wanted.
UPDATES!
Since I first put this post up, I found more things to update with the Nord color scheme. Also, after a few months of using Ayu-Mirage colors on a few apps here and there (and mismatching other programs with it), I just recently returned to Nord’s comfortable, icy blue arms.
First off, I no longer use the standard Nord GTK theme. I’ve since switched to the Adapta Nord theme, which also offers accent colors in the Aurora swatches from the Nord website.

Secondly, after using Kitty since switching from Alacritty, I’ve found it much simpler to switch themes with this command:
kitty +kitten themes From there, I can see Kitty’s built-in theme selection tool. All I need to do is scroll down to “Nord,” select it, choose to modify my config file, and it’s all done.
Last new update regards how I switched from SpaceVim (based on standard Vim) to LunarVim (based on Neovim). As a result, I had to find a new Nord theme that supported Neovim. Fortunately, I found an extremely complete theme on Github. It blends into my existing setup flawlessly and even supports theming lualine and other popular Neovim plugins in Nord colors without much fuss. (Looking at you, Powerline; I had an annoying workaround to theme it when I ran SpaceVim.)
I’m Sure There’s More
I’m constantly looking for more ways to incorporate the Nord theme into what I do on my systems. It’s ricing my system to match the particular color scheme that makes my computing experience that much more of a pleasure compared to running only a Light/Dark toggle or not bothering to change any settings at all. If I find more interesting themes, tweaks, or methods to incorporate the Nord theme elsewhere, I’ll be sure to post them.
What about you? What do you think of the Nord Theme? Do you like it or prefer a different color scheme like Dracula, Catpuccin, Gruvbox, and so on? Do you like to have everything match, or do you like to mix and match? Or is a simple selection of Light/Dark or a wallpaper enough for your tastes?

3 responses to “More Nord! Extra Ways to Use The Theme”
[…] I want a change, users can enter in hexadecimal color codes. I could always enter a Nord color at some point if I want to keep things […]
LikeLike
[…] able to get started immediately. One of the first things I did was swap out the default theme with Nord. Totally predictable, I know. But aside from that inevitability, swapping out themes with DMS is […]
LikeLike
[…] openSUSE system is generally running everything Gruvbox while I have Nord everything on my Arch system, so while chadwm comes with Nord options already, there wasn’t a […]
LikeLike