NOTE: I made a few updates now recommending both yabai and Sketchybar in addition to the other tools already listed in the post.
I have a confession to make. While I love Linux and prefer to use it, I haven’t used my openSUSE workstation in the past few months. My reliable ThinkPad has been collecting dust at home. While I am still free to use my tried and true Arch Linux machine at home, my new job’s network doesn’t play nice with openSUSE.
Believe me, I tried.
I tried just about everything I could think of, but it was no use. I went as far as reinstalling Fedora to see if I could reconnect, but no dice. Turns out the latest Fedora was just a little too new to have support. That would force me to use an older Fedora release. Sure, I could’ve installed an Ubuntu LTS, but was it worth it? I didn’t want to go through the trouble of wiping Fedora and trying again only to find that wouldn’t work either for whatever small reason. Even if it did, that was a lot more setting everything up all over again from scratch. My current job is a tad too demanding for that too.
Of course, my employer provided all of us with Windows laptops, but… eww. As a result, I had two options:
- Suck it up and use the slow and clunky Windows 10 laptop I’ve been issued.
- Use the M1 MacBook Air my best friend lent me a few years ago to work on NaNoWriMo.
What would Mr. Hyde pick? Well, considering the following:
- The Windows laptop had a much lower supported resolution.
- The M1, on the other hand, has a greater resolution. I can fit more on the screen and get more done with less effort.
- The Windows machine runs an Intel processor, is bulky, is a cheap Dell, and has a weak battery I don’t trust.
- The M1 has far better battery life thanks to Apple Silicon. It’s also much lighter since it’s an Air model, and it doesn’t die easily thanks to its processor.
- The Windows laptop takes forever to boot Windows 10, and then it still doesn’t connect to the company wifi automatically. Booting up requires starting a clunky, slow VPN client and entering my company password a second time (after I just logged in!) just to connect. Far too inconvenient, especially since I use a password manager to save generated passwords. Reaching for my phone each time I login doesn’t feel efficient or ideal.
- Aside from a relatively fast boot time (although macOS releases get slower with each new upgrade), the M1 doesn’t require any clunky VPN software to connect to our wifi. I only ever had to sign in once with a browser and it automatically connects me when I arrive at work. No problems whatsoever.
- I can’t install anything on the Windows laptop without submitting a support ticket through the tech department. Imagine waiting over a week for someone to show up simply to install the Colemak layout on my device because Windows still doesn’t want to support it natively.
- The M1 laptop, with my personal Apple ID from my college days, lets me install whatever I want as normal. It also comes with Colemak and plenty of other layouts by default much like, well, any good Linux distro.
While I may not agree with how Apple likes to have their walled garden, restrict customization in newer OS updates, or even make simple repairs a giant pain in the neck, I’ve been using the MacBook Air as a workstation instead of just NaNoWriMo this year.
But honestly, it hasn’t been bad. While I feel like I enjoyed OS X (now macOS) most a decade ago when Mavericks was still the latest, it’s really not that bad as a Linux user who has some needs such as package management, tiling windows, and terminal use.
In fact, that’s what this post is about. If you’re also a Linux user stuck with Apple, this one’s for you! This is also be helpful if you’re using an M1 Mac without the ability to run an Intel-based Linux distro. Yes, there are steps you can take to make the most of a macOS experience, to make everything feel a little more like home.
Unleash the Terminal!
Since modern Macs are Unix-like deep down on the inside, it’s not surprising to discover that there does exist an aptly-named “Terminal” tucked away in the user interface. Aside from having zsh set as default, it also ships with vi out of the box in case you need to edit text documents through it. While those are already better options than using Command Prompt on Windows, you can still make things better.
First off, you can always replace the good-enough default terminal with iTerm2. I mean, yeah, I can still install my preferred Kitty on macOS since it is cross-platform, but I really do like iTerm2. I like it enough to go out of my way to use it. It runs smoothly enough for my needs, it’s reasonably intuitive, and it doesn’t cost a thing. If you like it enough, though, you can always donate to the project through Patreon, cards, PayPal, or Bitcoin.
Once you have iTerm2 up and running, it doesn’t take long to navigate through the preferences and set things up to your liking. You can even do what I did and install powerlevel10k since zsh is the default shell out of the box on macOS.
Install and Remove Packages from the terminal with Homebrew

I’ve only barely scratched the surface of what iTerm2 is capable of doing on its own, but we can add package management thanks to Homebrew. Just run the above command to install it to your Mac and that’s it! You’ll have access to brew commands as a package manager.

brew to install packages is almost as simple as using apt or pacman on Linux.You can use brew to install packages as shown above, but sometimes, you’ll need to add a repository, or a “Homebrew Cask,” to gain access to more packages.

Just as expected, updating your Homebrew packages is as easy as entering brew update in the terminal. Considering macOS comes with plain old vi, Homebrew gives you a great chance to replace that with Vim or Neovim to make your Linux-like experience better on macOS. To get a better idea of what brew is capable of, see their helpful man page on their site detailing flags, variables, and so many other options.
Get a Tiling Window Manager with Amethyst or Yabai
This is where my experience isn’t quite on-par with what I expect on Linux, but this gets the job done and is far better than dealing with a floating window UI.
Amethyst is a tiling window manager that runs on macOS and feels right at home for most TWM users on Linux, although their own Github page specifically cites xmonad as the most relevant comparison.
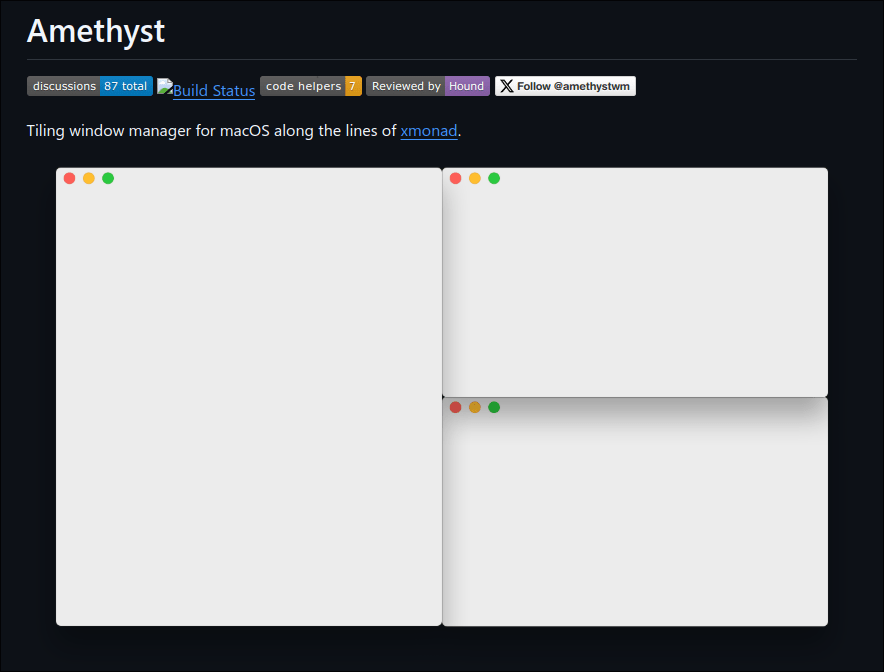
Installing Amethyst is a lot like installing most programs on macOS, although I haven’t checked if it’s installable with the aforementioned Homebrew. I simply downloaded the .pkg, dragged and dropped it like a standard macOS program, and then ran it. After granting some permissions for it in the settings (which can be cumbersome), Amethyst will be ready to auto-tile on macOS.
If I’m being honest, however, it does leave a bit to be desired, although I think that’s largely because of macOS limitations rather than Amethyst’s shortcomings. For instance, I like having focus follow mouse. It’s natural to me just like when I first used Awesome WM a few years ago, and it still feels just as natural on my Hyprland setup.
However, I get some occasional interface bugginess when enabling this setting on Amethyst. Sometimes, a small dialogue box pops up from a program I’m using. Because of this setting being enabled in Amethyst, it will become impossible to bring it up top or let it stay in focus. Disabling the setting, however, lets it float atop the window again. Why is this? I can’t even explain. It even happens in Brave when I try to manage extensions, which is aggravating.

Needless to say, this makes configuring my Brave extensions a tremendous pain unless I go out of my way to disable the focus follows mouse setting. I’ve noticed this most when trying to unlock Bitwarden or simply when I realize Dark Reader broke a site and I want to try disabling it for that domain.
I’m not sure if I caused this issue with some other setup problem or not, but there’s a strong chance I just configured something wrong.
One last thing about Amethyst is that you’ll likely need to reload Amethyst from the top bar to make any settings changes take effect. Other than that, it’s reasonably powerful and has a lot of shortcuts you can configure.
An alternative, in case you don’t like Amethyst, is yabai, which I haven’t really played around much with. I tried getting it to work on my old MacBook Pro Retina before I sold it several years ago, but I usually had issues. Again, it was probably something I was doing wrong with my setup. However, it seems to promise similar tiling window management for macOS. In the end, pick whichever you prefer.
UPDATE: It’s been quite some time, but after having to settle with constant compromises from Amethyst, I finally started to use the aforementioned yabai seriously. After getting a little help trying to set it up, I already like it much more than I ever liked Amethyst. However, I’d still recommend Amethyst to someone who wants to at least see what tiling windows on macOS could potentially be like. For any true power user, on the other hand, yabai is indispensable when it’s up and running.
Replicate Rofi with Alfred

I know Apple ships Spotlight on macOS, but I’ve never found it all that compelling compared to Alfred. Although it’s a freemium app, Alfred supports themes and lets you do much more than simply run programs. I shelled out for the Powerpack back in the day and still found it compelling enough to upgrade it again.
To really get the most of this as a Rofi or dmenu replacement, try installing Alfred and setting its shortcut to whatever you use to run Rofi or dmenu on your Linux system. For me, that’s Super + R for “Run.” In the case for a Mac keyboard, that’s Cmd + R.
The Powerpack adds a lot of functionality I can barely begin to wrap my head around because there are so many. I did use some of them a bit more back when I was in college, and I strongly appreciate having them available should I need them again now. You could say I upgraded my Powerpack since then just to keep supporting the developers.

An alternative to Alfred also includes (the freemium) Raycast. I have no issues recommending this one. Still, I wasn’t feeling it when I tried Raycast a year ago. Something about the UI just didn’t “click” with me when I gave it a try. However, it seems to have updated a lot since then, and many others do prefer it to Alfred. As the home page explains, it’s even installable via the aforementioned Homebrew package manager. If I ever used it again, I would easily set Cmd + R as my keyboard shortcut to run it. Ultimately, just pick whichever works better for you.
Customize Your Own Bar with Simple-Bar or Sketchybar

Now this is where things really start to look more Linux-like from a visual standpoint. Alas, I will be the first to admit that Simple-Bar is one of the things I haven’t tried on the M1 yet. In fact, I recalled fighting to get Yabar working with Yabai on my MacBook Pro before selling it, but it never worked.
I was perplexed too; I kept copying config files, I kept tweaking variables, and I kept reloading and relaunching. No dice. It wasn’t as straightforward as it was on Linux. The most I was getting was a blank taskbar, and I kept feeling I was doing something wrong, that I just couldn’t figure it out. Eventually, I gave up trying to use it. Just having tiling windows was enough for me, although I did feel burned that I couldn’t get something akin to Waybar or Polybar working on my system at the time.
Still, if it weren’t for the fact that I use my M1 MacBook mostly for work instead of leisure, I would have already at least tried Simple-Bar on my setup. Besides, considering macOS’s inherent limitations, I feel like something would just go wrong like it did on my MBP a good while back. However, I can recognize if others would love the option, and I do know many others have gotten lovely setups working with no issues.

Even if I got Simple-Bar (or any other drop-in replacements for Waybar or Polybar from Linux) running, I feel like I’m happy enough with everything else I’ve tried, especially my auto-tiling.
UPDATE: Also up for consideration is Sketchybar, which I found quite easy to get up and running on my M1 MacBook. After having AI generate me a basic but good-looking enough sketchybarrc file, I was able to tweak around slightly until I had something that looked truly amazing. Paired with Yabai, I finally feel like I made macOS feel as powerful as a tiling window manager on macOS.

Anything is Better Than Windows
I get that a lot of other Linux enthusiasts may still prefer Windows for one reason or another compared to the likes of Apple. Windows usually feels more open than macOS, for instance. Windows also tends to have great support overall, especially for games. Then there’s the obvious fact that Windows systems are usually more modular or easy to repair compared to their Apple hardware counterparts.
Fortunately, if somebody really wants to get a Linux look and feel on Windows instead, I’ll admit I briefly tried out Seelen UI for Windows 11. Then there’s the fact that Windows has options for PowerShell package management such as Chocolatey, Scoop, or Winget. Not to mention Microsoft PowerToys, while including a lot of goods that should just be on Windows by default, provides the best Windows launcher that somewhat compares to Rofi.
While all of that is nice, the big drawback is still there. Deep down, it’s still Windows, and I would prefer to never go back to daily driving Windows if possible. In my use case, I would take macOS over Windows when given the choice for the workplace, and I have no plans to change this. Installing anything that can replicate my Linux experience is a godsend. I can’t thank my best friend enough for letting me use his M1 MacBook Air.
To any Linux users out there: Have you ever had to settle with macOS or Windows when using a laptop or computer at the workplace? If so, what was that like? How did you deal with it? Feel free to comment if you’ve ever been in the same boat, because I know I can’t be the only one. I’d love to know what your perspective is on this.

6 responses to “Make macOS Feel More Like Linux (UPDATED)”
[…] at work, I had to pause myself before opening up TIDAL on my workplace MacBook Air. I couldn’t listen to TIDAL (again) because it was streaming, so my work continued in […]
LikeLike
[…] workstation running openSUSE, and a server running Ubuntu. Despite that, and despite the fact that I’ve been using macOS on an M1 at work (because it’s either that or being stuck with Windows), I do have a somewhat soft spot for […]
LikeLike
[…] my history using Linux over the past few years, and despite how I have to use a Mac at work, I typically default to not only Arch Linux, but Hyprland with my […]
LikeLike
[…] apps. If I don’t need to, I tend to prefer LibreOffice apps on my Linux machines or MacBook Air M1 workstation, and I’ll run abandonware versions of Microsoft Office on my Power Mac G5 […]
LikeLike
[…] One last thing is more like a risk that came up, but I will be taking a flight to visit family closer to Thanksgiving. As a result, there is a slight chance I won’t be able to update the existing draft in the final stretch of NaNoWriMo. I was counting on exporting my progress and seeing it it could open on a modern copy of Scrivener that I run on my M1 MacBook Air workstation. […]
LikeLike
[…] MacBook Air M1 that my friend gave me a while back, giving me a way to work on the draft during a […]
LikeLike