I’ve been using Fedora since version 33 was out, although 34 came shortly after I started to use it. It’s understandable since my ThinkPad Carbon X1 Gen 8 originally came with Fedora 33 out of the box. (Yes, Lenovo lets you order some systems with Linux installed on them from the factory.)
But aside from that, Fedora 38 dropped last night with the usual big changes. I don’t have a list of them, but I knew I wanted to upgrade anyway for two primary reasons.
- Fedora releases are only supported for 13 months. It’s not too long compared to Ubuntu’s occasional LTS releases or any rolling-release distro like Arch, but I prefer to upgrade now rather than put it off.
- The new Fedora 38 release comes with GNOME 44. Despite the fact that I use a tiling window manager, I like to use GTK-based apps here and there, and I am somewhat excited to see what’s gnext for GNOME.
As somebody who has upgraded from each version of Fedora since 33 all the way to 38, I decided it would be appropriate to write this guide on the process.
However, I have a few notes to keep in mind.
- I only recommend upgrading from one incremental version to the next at a time. For instance, if you have a computer on Fedora 34, I would recommend upgrading it to 35, then 36, and so on. If you’re going to upgrade to the latest and greatest at the time I write this, then please be on Fedora 37 to get Fedora 38.
- You should likely do a backup first. I learned my lesson after I accidentally my Arch system (again, not a typo) and had no backups due to laziness and impatience. Fedora uses btrfs, which makes backups a breeze, so there’s little excuse for not doing so.
- If you’re a longtime Fedora user and you’ve upgraded from one version to the next before, you likely have
dnf-plugin-system-upgradeinstalled. People who are still relatively new to Fedora can install it before getting started. - This tutorial will focus primarily on using the Terminal for the upgrade. I know there’s a GUI upgrade method, but really, where’s the fun in that?
Upgrading Fedora through CLI
Pop open the terminal of your choice (I’m a fan of Alacritty, personally) and update everything on your system beforehand. However, since you’re getting ready to upgrade to a new release, I recommend adding the --refresh flag just to be on the safe side.
sudo dnf upgrade --refreshNext, assuming you’re on Fedora 37 going to 38, you’ll enter this following command:
sudo dnf system-upgrade download --releasever=38For later releases of Fedora (going from 38 to 39 half a year from now, for example), update the --releasever= flag to use the number of the release you want to upgrade to.
Again, you will need to have dnf-plugin-system-upgrade installed to do this. If you haven’t installed it, run sudo dnf install dnf-plugin-system-upgrade first.
If you’re anything like me and you have some broken dependencies or other issues, try again and add the --allowerasing flag to the above upgrade command.
sudo dnf system-upgrade download --releasever=38 --allowerasingYou’re going to be downloading a lot of files, and you may even need to accept a GPG key.
Once the download finishes, you won’t be done just yet.
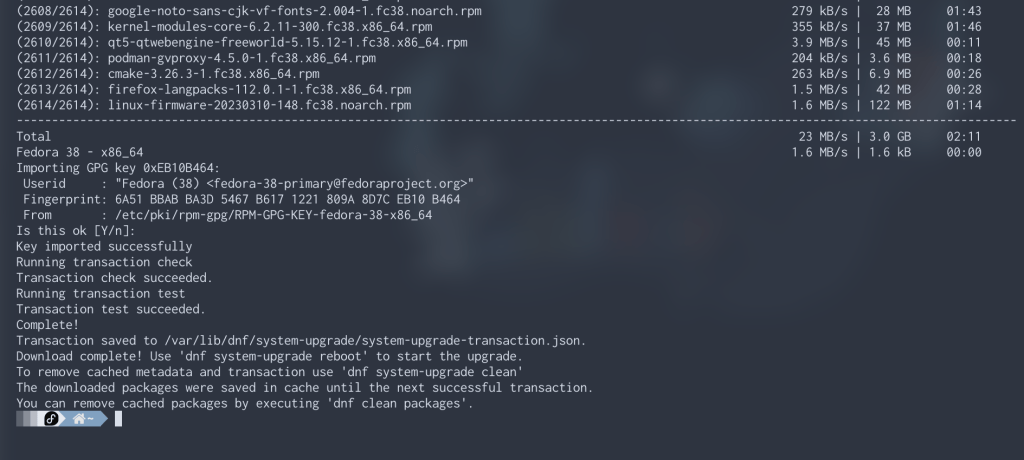
As the output says, you can just run the following command to get started with the reboot right away:
sudo dnf system-upgrade rebootThough optionally, you could also run the other commands to clean things up once you’re finished with your upgrade.
sudo dnf system-upgrade cleanBut speaking of finishing the upgrade, it’s going to take some time, so once you start that reboot and upgrade process, be patient. As tempting as it may be, I don’t recommend running this on a workstation computer while you need it to stay productive.
Something else I’ll add is how long the upgrade bar was hanging at 0% complete for me. It sat at that point for several minutes, but it eventually moved slowly to 2% and onward in small increments. Don’t freak out if it doesn’t start showing progress right away; just give it several minutes to do its thing.
What About GUI?
The GUI method is so straightforward that it doesn’t even really need a dedicated tutorial for it. In fact, I could summarize it here in just a few steps:
- Open up the Settings app in GNOME.
- Click “About” at the very bottom of the sidebar on the left.
- Click the “Software Updates” button at the bottom.
- Wait until it asks you to download the next Fedora release.
- Download it.
While it may seem more straightforward and simple, I still prefer the CLI method for a few reasons.
- I have a little more control over what I’m doing when I upgrade through the terminal.
- I can see everything that gets downloaded or upgraded through the output.
- The simplest reason of all: it’s just more fun.
Did It Work?
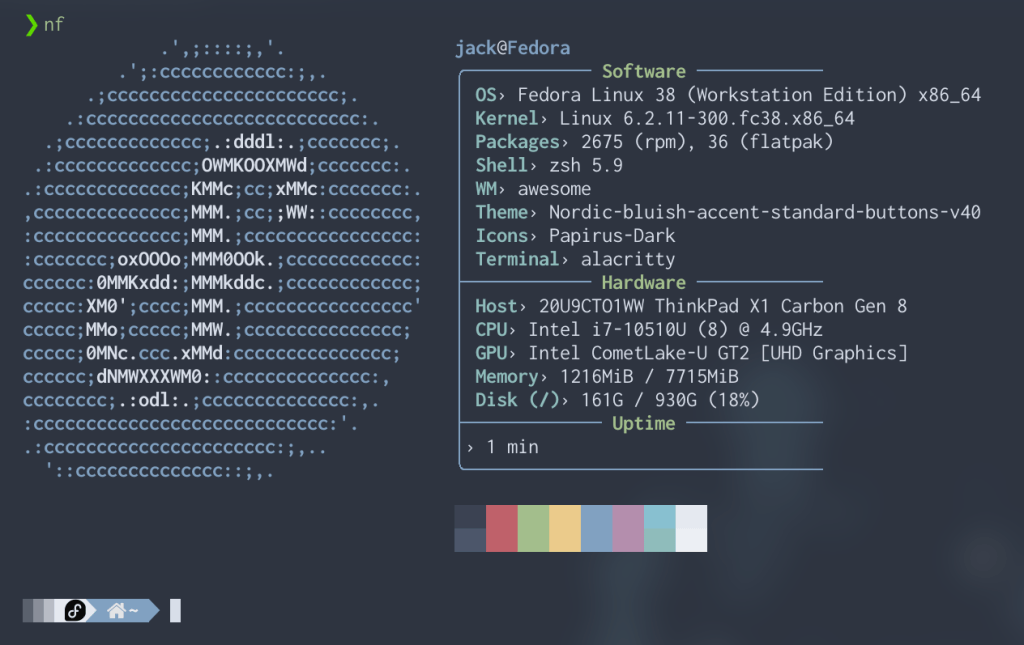
Once you’ve finished the process of upgrading, boot into your system and check if the upgrade was successful. It likely will be unless you have something unusual going on with your configuration (you’ll likely even know before booting if something went wrong), but you can still check in multiple ways.
- Run
neofetchin your terminal and take a glance at what the OS output is. - Run
cat /etc/os-releasein terminal and look at the first few lines for your release number. - Assuming you have a graphical desktop environment, open the aforementioned settings and “About” screen to see your release number.
Anyway, I only had one minor quirk after upgrading: i3lock-color somehow uninstalled itself in the process (I did --allowerasing after all), but that was easily remedied by reinstalling it from the Github page. My config was still exactly where I knew it was, so no harm, no foul.
So that’s it!
Do you use Fedora? If so, did you upgrade already? How was the upgrade process? What about the experience post-upgrade? If not, do you use a different distro entirely, or are you running a different OS from Linux altogether?
